Getting started with Zotero Linked Mindmaps
By the end of this you will have two of your own items on a mindmap with a labelled line between them. It takes about ten minutes. Do the steps in order, because later ones assume the earlier ones happened.
You need Zotero 7 or later and a library with at least two regular items in it. Any two will do: articles, books, whatever you already have.
1. Install the plugin
- Open the latest release and download
zotero-linked-mindmaps.xpi. If your browser opens the file instead of saving it, use "Save link as". - In Zotero, open Tools, then Plugins.
- Click the gear icon at the top right of the Plugins window and choose "Install Plugin From File...".
- Pick the
.xpiyou downloaded and confirm. - Restart Zotero.
Later versions arrive through Zotero's own plugin updater; the build carries an update URL, so there is nothing to subscribe to.
To build the .xpi yourself instead, clone the repository, run npm install and npm run build, and install the file that lands in .scaffold/build/. If you are working on the plugin rather than using it, npm start builds and loads it into a dev profile. See development setup.
2. Check that it loaded
After the restart, a small popup appears in the bottom right of the Zotero window reading "Addon is loading", and a second later "[100%] Addon is ready". That popup is the plugin telling you it started.
It is easy to miss. If you did, open Tools, then Plugins, and look for Zotero Linked Mindmaps in the list. Do check: when a Zotero plugin fails to load it does so quietly, with no error dialog and nothing in the interface to tell you, so the Plugins list is the only place the failure shows up.
3. Open the Mindmap tab
Open the Tools menu and click "Mindmap". Shift+G does the same thing from anywhere that isn't a text field.
A tab titled "Mindmap" opens and stays selected. Open it again later and you land back on the same tab, so you can't end up with four of them.
If the library has no mindmap yet, the plugin makes you one on the spot and calls it "Mindmap". The graph area will be blank, since there is nothing in it.
On a fresh library that is all you should see. But if a warning turns up instead, reading "Mindmap data for this library is in the trash. Nothing new was created; restore it to get your mindmaps back.", then this library has had mindmaps before and they are sitting in Zotero's trash. Restore them and reopen the tab. Don't start over: the work is still there.
4. Find your mindmap in the sidebar
The strip down the left of the tab is the mindmap list. It is headed "Mindmaps" and holds one row per mindmap in the library, so right now you should see a single row reading "Mindmap".
The ‹ button at the top collapses the strip to a narrow bar; › brings it back. The tab remembers which state you left it in.
5. Give the mindmap a name of your own
- Hover the "Mindmap" row and click its pencil icon (tooltip "Edit"). The list is replaced by a short form.
- Clear the "Title" field and type something, for example
Reading map. - Type anything you like into "Description (optional)", or leave it empty.
- Click "Save".
The list comes back with the new title and the description under it in smaller text. Renaming touches the title and the description and nothing else, so your nodes and links are safe.
One request: leave this as the only mindmap in the library until you finish. Step 6 leans on that, and I explain why when you get there.
6. Add two items from the library
- Click the Library tab to switch back to your items.
- Select two items, holding Ctrl (Cmd on macOS) to pick the second one.
- Right-click the selection and choose "Add to Mindmap".
A popup confirms with "Added 2 items to Chapter one", naming the mindmap. Both items are now nodes.
Here is the reason for step 5's request. With one mindmap in the library there is nothing to choose between, so "Add to Mindmap" is a single click that writes straight to it. Once you have several, that same entry opens a submenu and you pick the target by name. Neither behaviour is hard, but the one-click version is a cleaner first experience. The library right-click menu covers both, and you can do the same job from the Mindmaps section.
7. Look at the graph
Switch back to the Mindmap tab. Your two items are sitting on the canvas as labelled circles. Notice you did not have to reopen anything: the graph watches the mindmap it is showing and redraws itself when the mindmap changes.
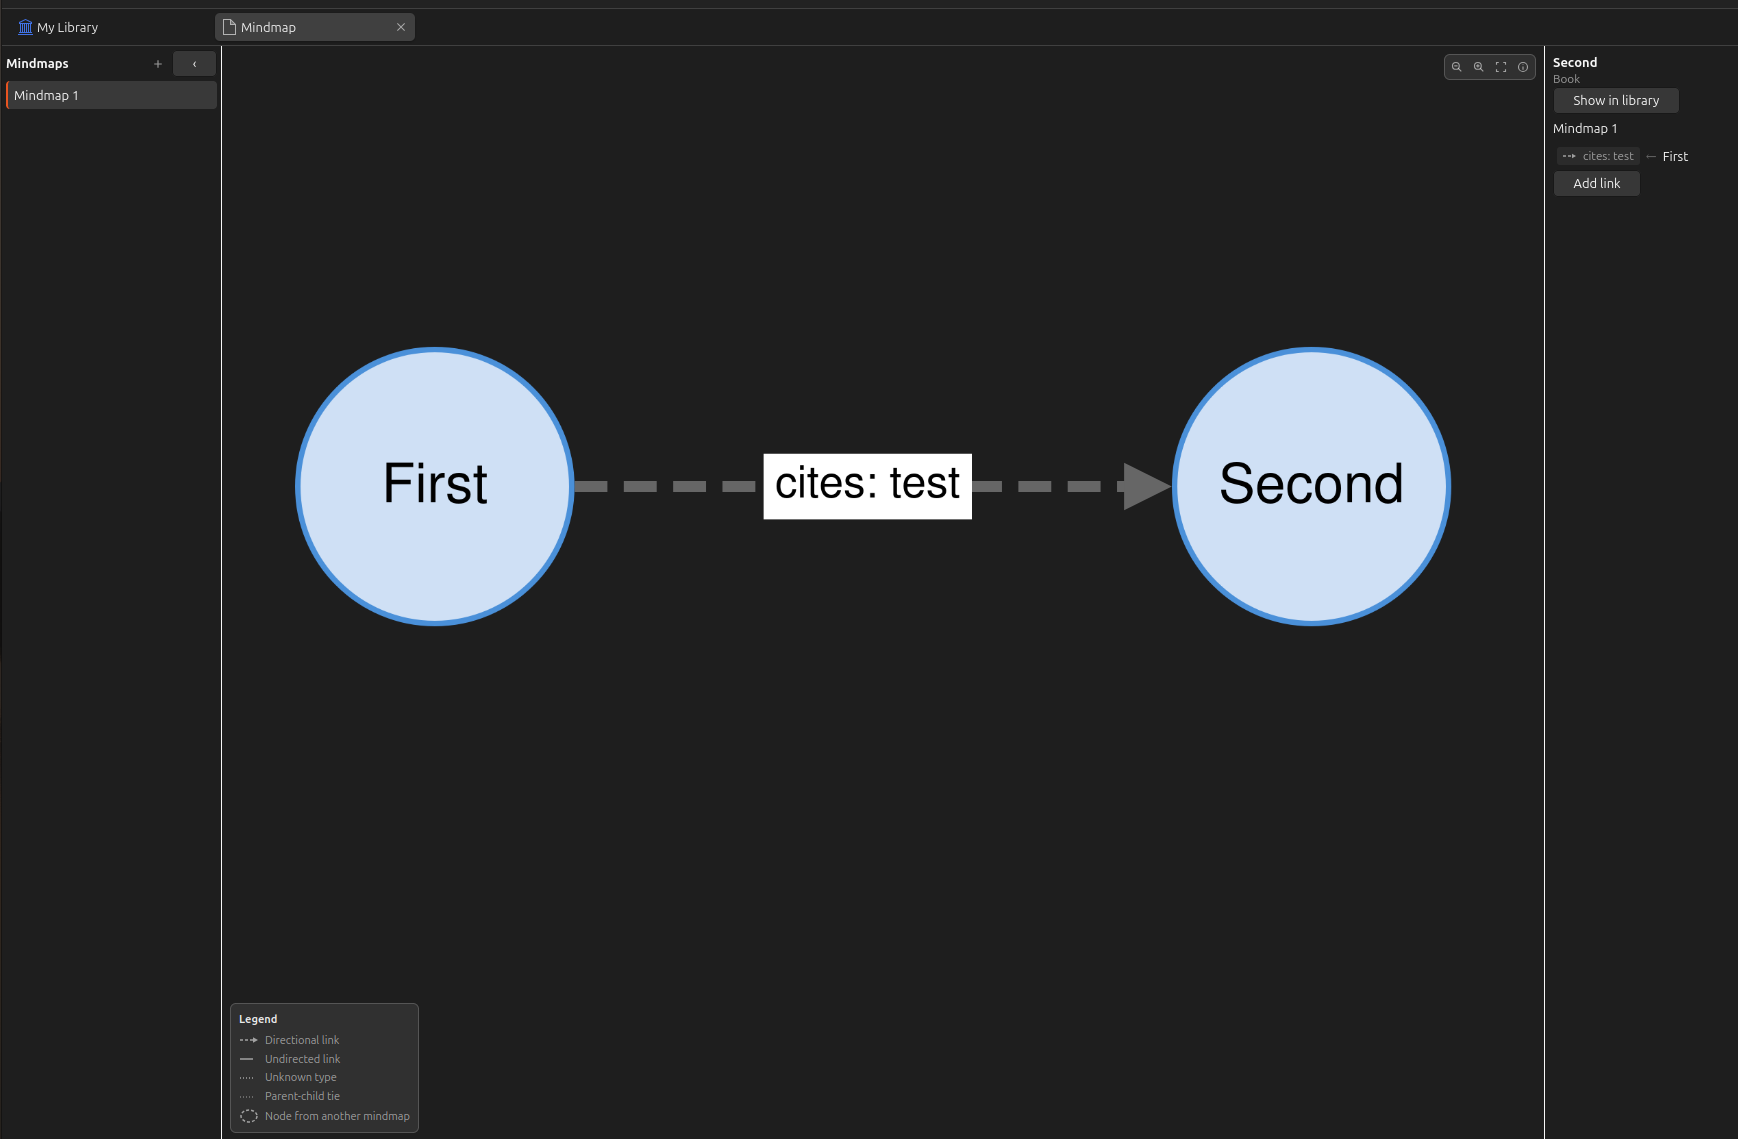
Each node carries the item's title. Notes are the exception, because a note's title is usually some truncated first line that tells you nothing, so a note node shows the first 60 characters of the text instead.
Now drag a node somewhere else. Where you drop it is saved immediately, and it will be in that spot next time you open the tab. Nodes that have never been dragged get placed automatically; node layout explains how.
8. Open a node in the dock
Click one of the nodes. A panel opens on the right of the tab with the item's title in bold, its item type, first creator and date, a "Show in library" button, and the item's mindmap links underneath.
For now the links section reads "No links yet." Leave the panel open.
The close icon (tooltip "Close") hides the panel again. "Show in library" jumps Zotero to that item over in the Library tab, which yanks you out of the graph, so it sits behind a deliberate button press instead of firing whenever you click a node. The node overview panel page lists everything in there.
9. Link the two items
- Right-click the node you just clicked. A small menu appears at the pointer with one entry, "Add link".
- Click "Add link". The panel on the right switches to the link form.
- Pick a value in "Type". The list ships with
cites,supports,contradicts,primary source forandrelated to. - Type something into "Name (optional)" if you want this one link labelled beyond its type, for example
chapter 3. - If the type you picked is directional, a "Direction" field appears. Each option names both ends using the type as the verb, so the first one means the link runs from the node you right-clicked to the target you are about to pick.
- Click "Choose target…". Zotero's item picker opens.
- Pick the other item and confirm. Its title appears next to the button, and "Save" becomes clickable.
- Click "Save".
The graph redraws with a line between the two nodes, labelled with the type (or type: name if you filled in a name). Directional types draw as a dashed line with an arrowhead, non-directional ones as a plain solid line.
You may have noticed the form never asked which mindmap to put the link on. It uses the one the graph is drawing, which is the one in front of you. The "Add to mindmap:" question only turns up where the plugin genuinely cannot work it out: the item pane's Mindmaps section, in a library that holds several mindmaps.
The form does more than this, including linking to a node that lives in a different mindmap. See adding links and link types.
Where to go next
That is the whole loop: add items, link them, arrange them. Everything else is variations on it.
If you want to pen several nodes into a labelled region, read the grouping how-to. For creating, renaming and deleting mindmaps, managing mindmaps. If you would rather just see every control in the tab listed out, that is the mindmap tab reference.
And sooner or later you will spot an item in your library called "Zotero Linked Mindmaps (plugin data)" and wonder what it is doing there. Plugin data explains where your mindmaps actually live, and why they live there.